
Launch a Whisper Finetuning Job
This guide walks you through the process of fine-tuning a Whisper Model using MonsterTuner - a no code scalable fine-tuner
Pre-requisites
Before proceeding further, please ensure that the following conditions are met:
- Have a valid MonsterAPI account - Don't have an account? Sign up.
- Minimum 1,000 API credits required - Haven't purchased yet? Explore our plans.
- After logging into your account, open the "Fine-Tuning" Portal from left side menu.
- Then click on the "Create New Finetuning Job" button and select “Finetune Whisper Model”.
Now you are all set to follow the steps for crafting and launching a Whisper finetuning job.
Step by step guide:
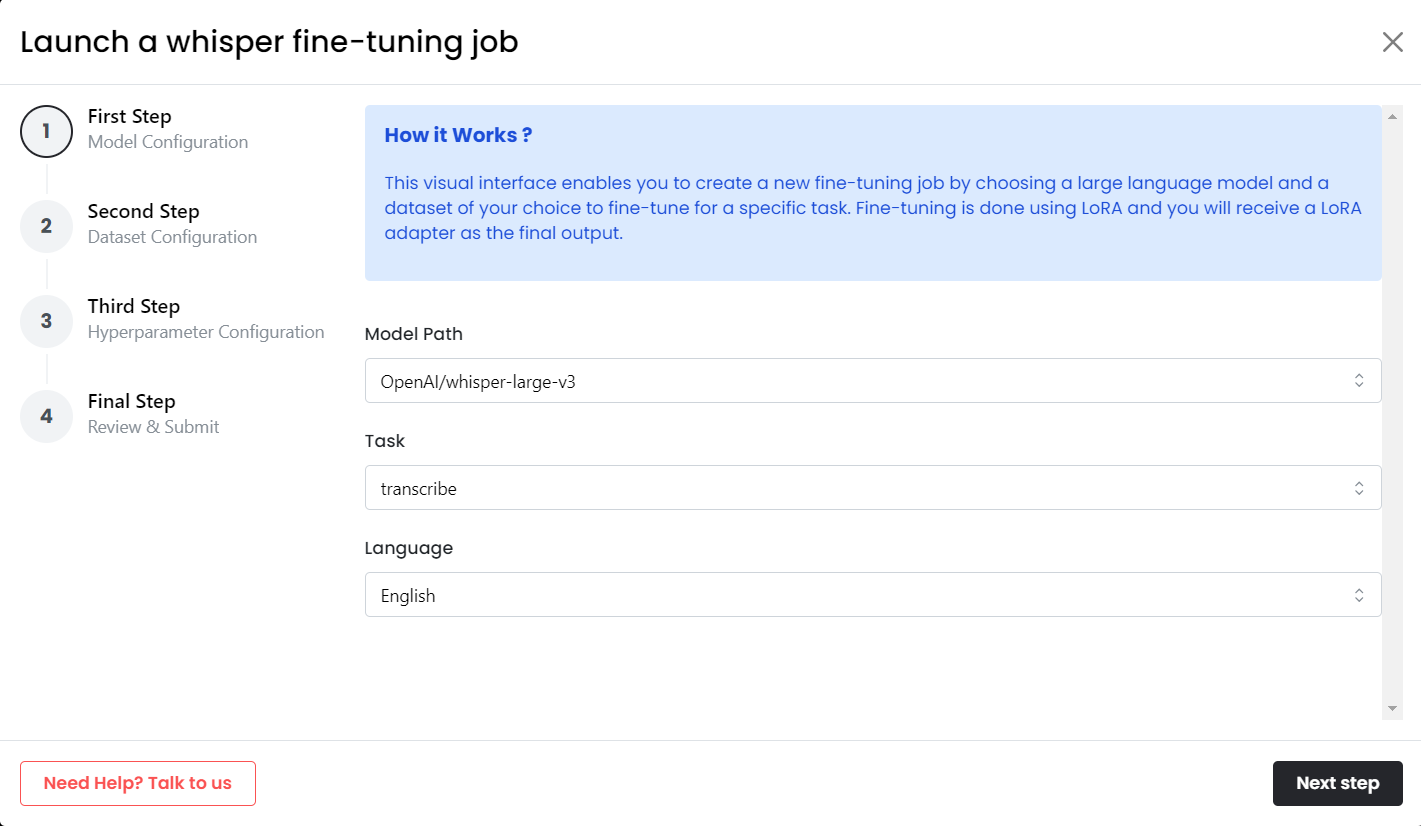
Select a Whisper model from the dropdown menu that suits your use case. Options include the latest models such as whisper-large-v2, v3, tiny, medium, base, large, and distill whisper.
Define the task as either Transcribe or Translate.
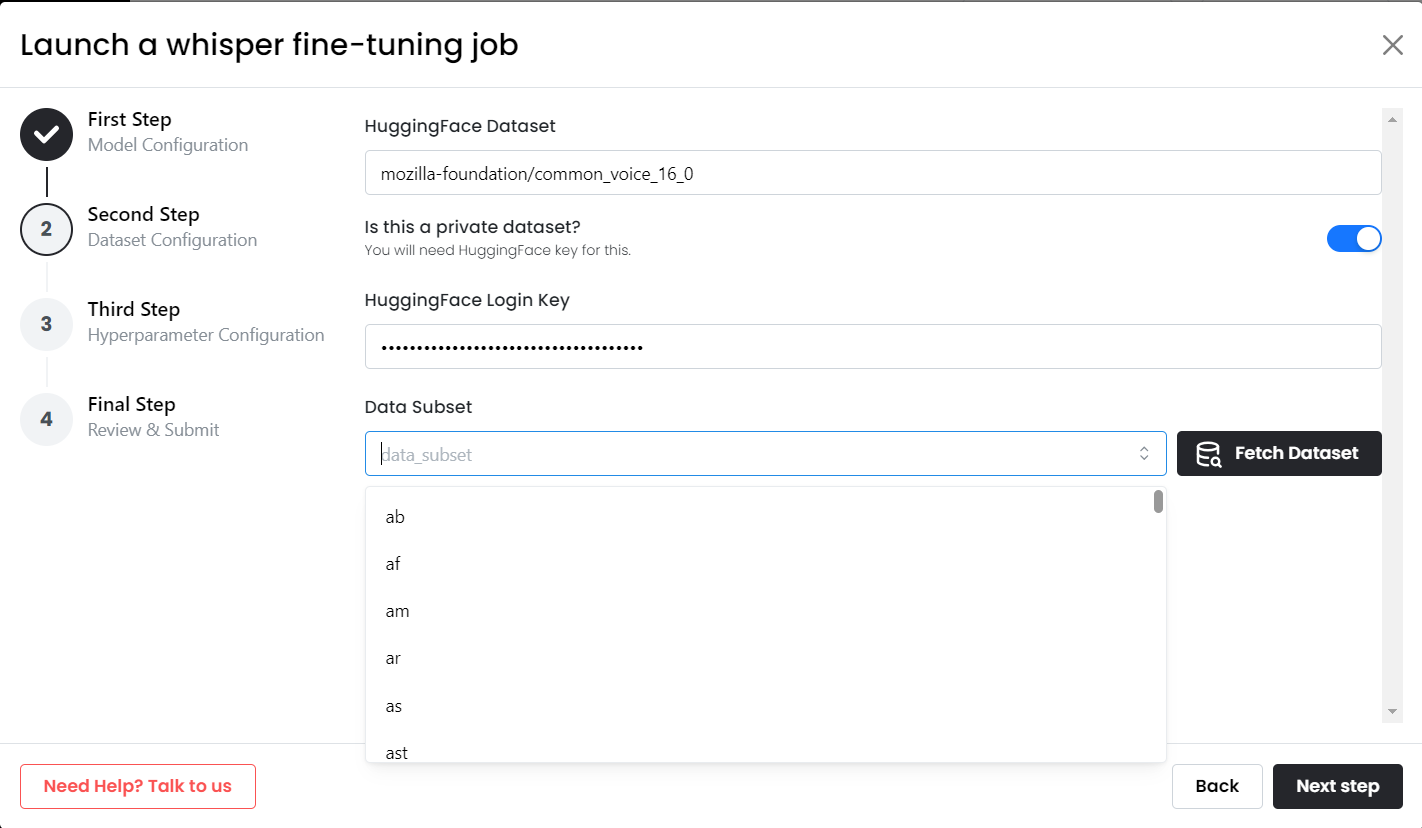
Option 1 - Use any Hugging Face Dataset:
Please provide the dataset name for the Hugging Face dataset to fetch and use. If an HF key is required, please provide it. If subsets are enabled, you can choose from the dropdown menu.
Some Example Datasets to choose from -
- Mozilla Common Voice Dataset - HuggingFace Dataset
- English Dialects - HuggingFace Dataset
- Peoples Speech - HuggingFace Dataset
- Voxpopuli Dataset - HuggingFace Dataset
Option 2 - Upload a Custom Dataset:
You can also upload a custom dataset of your choice as a zip file. If the dataset has no subsets, the default subset is automatically selected.
Convert ZIP of Audio Files to Parquet for MonsterAPI Whisper Finetuner
- Utilize the provided Colab Notebook to format your ZIP file containing audio files and transcript metadata into a Parquet dataset.
- The Notebook will automatically initiate the upload process to Hugging Face.
- This action will enable compatibility with the MonsterAPI Whisper Finetuner.
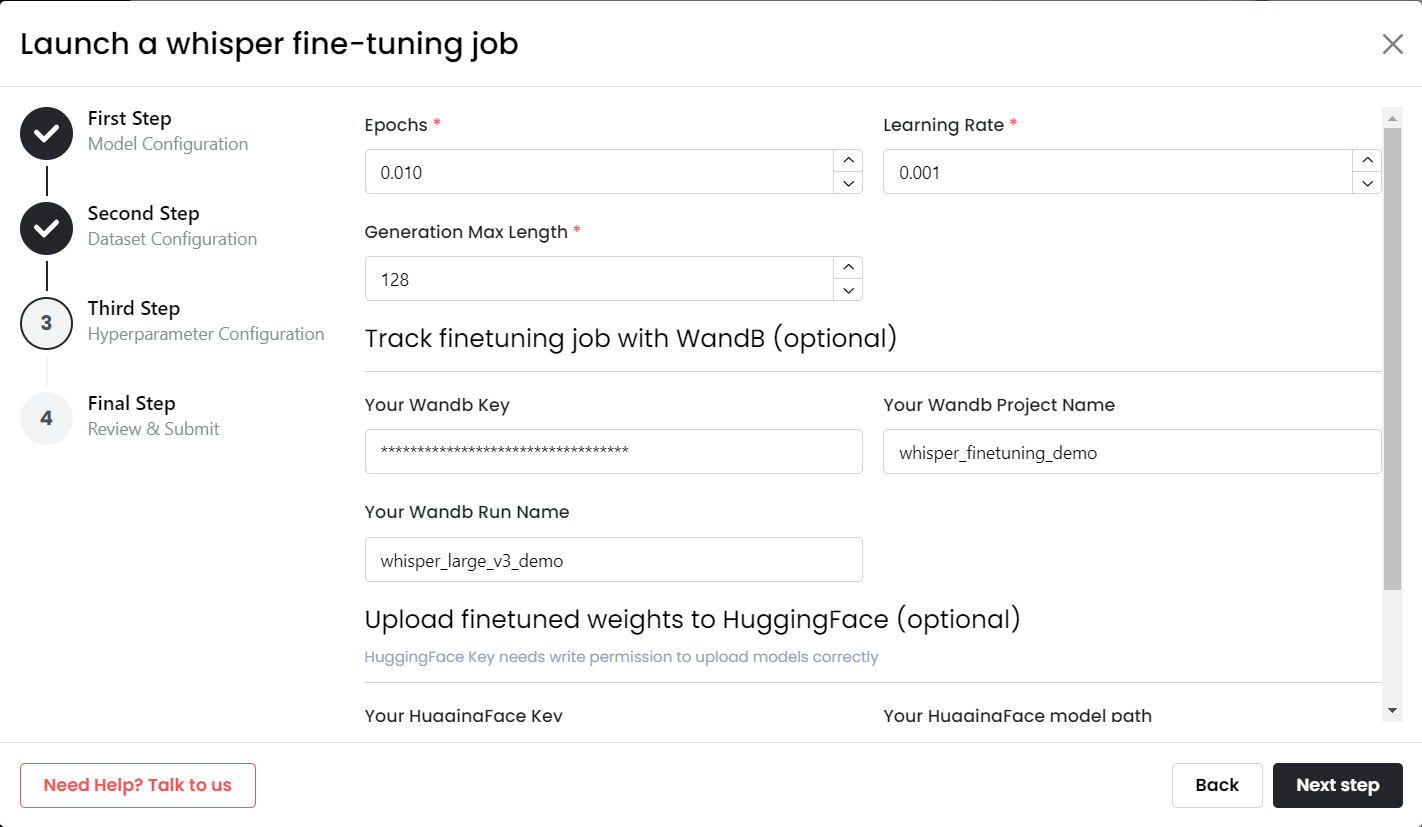
In this step, set your hyper-parameters such as epochs, learning rate, cutoff length, warmup steps, and so on. These parameters are automatically filled based on your chosen model, but you can modify them according to your needs.
HuggingFace and WandB credentials can be provided to upload the model into HuggingFace and record training logs into WandB.
Please note: These parameters affect the fine-tuning process and can also lead to failure if not set correctly.
Click on Next to proceed to the summary page.
Review the final job summary to ensure all the settings are correct, then submit your request.
That's it! Your finetuning job starts in a couple of minutes and when it switches to IN PROGRESS state, you would be able to view the job logs and metrics (see next section for setting up metrics tracking using WandB).
⚙️ Optional Settings
-
Track your Fine-Tuning job using WandB:
To track your fine-tuning run, you may add your WandB credentials on Third step:
- Your WandB username
- Your WandB key (you can get your WandB key here)
- Your project name (go to WandB and create a project if you don't have already)
- Your WandB run name (could be any random name of your choice)
If you add these valid credentials, the job will automatically start sending metrics to your WandB project so you can track the progress in your experiments.
-
Upload model outputs to Huggingface Repo:
If you want to store the final fine-tuned model weights in a HuggingFace repository, add your HuggingFace credentials on Third step:
- Your Huggingface API Key (Must have write access)
- Your Huggingface Repo Path
If you add these credentials, the job will automatically publish the fine-tuned weights to your huggingface repo upon completion.
That's it! Finished!
Updated 11 months ago